
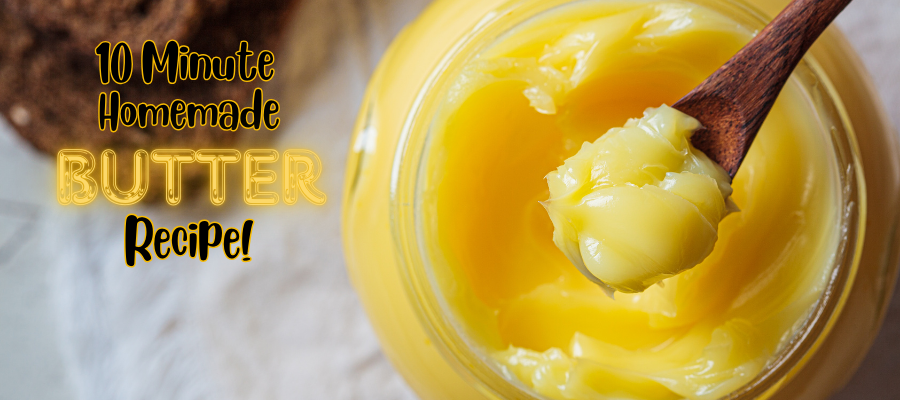
How to Make Your Own Farm-Fresh Butter in 10 Minutes—No Churn Needed!
Learn how to make your own delicious, farm-fresh butter in just 10 minutes—no fancy equipment needed! With just a mason jar and some heavy cream, you'll whip up creamy, flavorful butter right at home. This fun, easy-to-follow guide will have you shaking your way to homemade butter in no time.
RECIPES
If you’ve ever tasted real, farm-fresh butter, you know there’s nothing quite like it. The creamy, rich taste that melts in your mouth is far superior to anything you can buy in a store. And the best part? You don’t need a fancy butter churn or hours of hard work to enjoy homemade butter. In fact, you can whip up your own delicious batch in just 10 minutes, using only a mason jar and a few simple ingredients. Yes, it’s that easy!
Picture this: you’re in your kitchen, maybe it’s early in the morning, and you’ve got the soft glow of sunlight peeking through the windows. You can already smell the coffee brewing, but what’s missing? Butter. Not just any butter, but the kind that you made with your own two hands. It sounds impressive, right? Well, it’s also incredibly simple. Let’s walk through the steps to make your very own butter—no churn needed.
First, you’ll need some heavy cream. Now, if you’re lucky enough to have a dairy cow in the backyard, feel free to grab your cream straight from the source (give Bessie a pat on the head for me). But for the rest of us who may not have livestock at arm's reach, a trip to the grocery store will do just fine. Look for heavy cream or heavy whipping cream—both will work. The richer the cream, the richer the butter. You only need about a cup for this recipe, though you can adjust based on how much butter you want.
Next, find a clean mason jar with a lid. A pint-sized jar is perfect, but any jar with a tight-fitting lid will do. If you’ve been meaning to use up that stash of jars from last summer’s canning frenzy, now’s your chance! Pour the cream into the jar, filling it about halfway. You want enough room left in the jar for the cream to shake and do its magical transformation into butter.
Now comes the fun part: shaking. Screw the lid on nice and tight—you definitely don’t want any cream escaping during this process—and start shaking the jar. Really get into it! This is the part where you can let loose and have a little fun. If you have kids around, get them involved. You might even make a little game out of it. Imagine you’re on a farm, wrangling cattle or herding chickens, and this butter-making session is part of your daily chores.
As you shake, the cream will first turn into whipped cream. You’ll be able to tell because the liquid will thicken, and you might hear less sloshing inside the jar. Keep shaking! After a few minutes of vigorous effort (this is where you can justify skipping arm day at the gym), you’ll notice something amazing start to happen. The cream will separate into two parts: a solid and a liquid. The solid is your butter, and the liquid is buttermilk! Yes, in just a few minutes, you’ve made two homemade treats.
When you see that separation, you know you’re close. Keep shaking for another minute or two just to be sure all the cream has turned. Once you’ve got a solid chunk of butter and some buttermilk floating around in the jar, it’s time to stop shaking and take a look at your masterpiece.
Open the jar and marvel at the sight of your very own butter. But hold on—there’s still one more step before you can spread it on a fresh piece of bread. You’ll want to drain off the buttermilk. This liquid is great for using in pancakes, biscuits, or even drinking if you’re feeling adventurous. You can strain the butter through a fine mesh sieve, cheesecloth, or even just use a spoon to hold the butter back while you pour the buttermilk into another container.
Now, to make sure your butter stays fresh and has the best texture, you’ll need to rinse it. It sounds fancy, but it’s really just a quick rinse with cold water. Plop the butter into a small bowl and pour some cold water over it. Use a spoon or your hands to gently press and fold the butter, rinsing out any remaining buttermilk. You may need to rinse it a couple of times until the water runs clear. This step is crucial because leftover buttermilk can cause the butter to spoil more quickly.
Once your butter is rinsed, you’re pretty much done! At this point, you can decide if you want to add a little salt for flavor. A pinch or two of sea salt can really bring out that rich, creamy taste, but if you prefer unsalted butter, you’re ready to go as is. Just give it a final press to remove any excess water, and there you have it—fresh, homemade butter in under 10 minutes.
Spread that golden goodness on a slice of warm bread, melt it over roasted vegetables, or swirl it into mashed potatoes. You’ll taste the difference immediately. It’s creamy, smooth, and has a depth of flavor that no store-bought butter can compete with. Plus, there’s something so satisfying about knowing you made it yourself with just a jar and a little bit of elbow grease.
If you’re wondering what to do with all that leftover buttermilk, you’re in for a treat. Buttermilk pancakes are a classic, of course, but you can also use it to make tangy salad dressings, tenderize meat, or even bake up a batch of fluffy biscuits. The possibilities are endless!
Here’s a little secret: once you’ve made butter at home, you may never want to go back to the store-bought kind again. And why would you? It’s quick, easy, and way more fun to make your own. You’ll feel like a homesteader, even if you live in the city. So next time you’ve got a few minutes to spare and a carton of cream in the fridge, grab a mason jar and get shaking.
Who knew that making butter could be such an adventure? You’ve just turned a simple kitchen task into a mini workout, a science experiment, and a delicious treat all in one. So go ahead, give yourself a pat on the back—and maybe a little extra butter on that second slice of bread. You’ve earned it.
Enjoy your farm-fresh butter, and don’t forget to share the secret with friends. They’ll be impressed when you tell them it only took 10 minutes (and maybe a bit surprised when they see your newly toned biceps!). Whether you’re a seasoned homesteader or just starting your DIY journey, this is one kitchen hack you’ll want to keep in your back pocket. Now, excuse me while I grab my own jar of cream and start shaking—breakfast just isn’t the same without a little homemade butter on top.
Support@rusticrootshomestead.com
© 2024 Rustic Roots Homestead - All rights reserved.