
Making Your Own Beeswax Candles
Making your own beeswax candles at home is a fun and rewarding project that anyone can try! Not only do beeswax candles look and smell amazing, but they’re also natural and eco-friendly. Plus, they give you that cozy, warm feeling, like snuggling up with a soft blanket on a chilly evening.
RECIPES
Today, we're going to walk you through the process of crafting your very own beeswax candles, from start to finish. So roll up your sleeves, grab your ingredients, and let’s get started on this candle-making adventure!
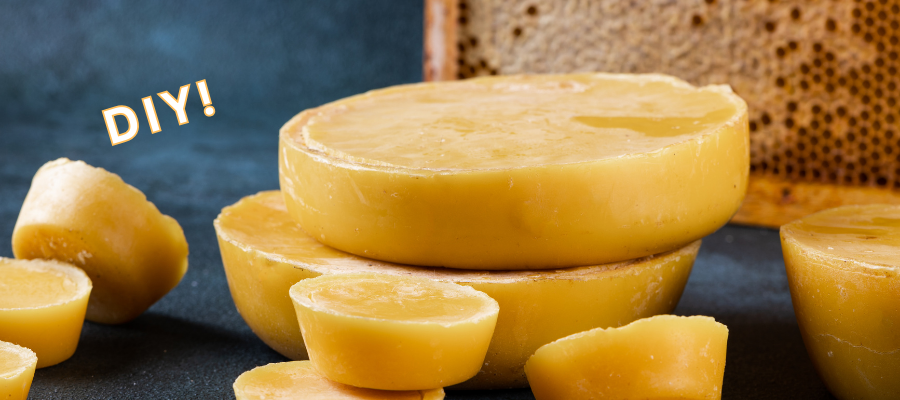
First things first, let's talk about materials. The star of the show, of course, is beeswax. This magical substance is made by—you guessed it—bees! Beeswax is what bees use to build their honeycombs, and it's packed with a sweet, natural scent that’s like a warm hug for your nose. When you burn a beeswax candle, it releases that lovely honey aroma, which can fill your home with a calm, soothing vibe. But beeswax isn't just about smelling good; it's also cleaner and longer-burning than other types of candle wax. You can find beeswax in craft stores, online, or even at your local farmer’s market. It usually comes in pellets, blocks, or sheets, but for our candle-making adventure, pellets or a block work best.
Next, you’ll need wicks. Think of wicks as the heart of your candle. They’re what keep the flame alive, allowing the candle to burn bright and long. When choosing a wick, make sure it’s 100% cotton or hemp. This ensures that the wick burns cleanly and safely, without any yucky chemicals or weird smells. Wicks come in different sizes, and the size you need depends on the size of your candle. If you’re unsure, don’t worry—just ask someone at the craft store, and they’ll point you in the right direction. You’ll also need a wick holder or a pencil to help keep the wick in place while your candle sets. More on that later!
You’ll also need a container for your candle. This could be a glass jar, a metal tin, or even an old teacup you found at a thrift store. The container should be heat-resistant and something that makes you smile when you look at it. After all, part of the fun of making your own candles is creating something that reflects your personality!
Now that we have our materials ready, it’s time to prep our workspace. Candle-making is a bit like baking cookies—things can get messy if you’re not careful! Lay down some newspaper or an old tablecloth to protect your surfaces from any drips or spills. Gather all your materials together, so you’re not scrambling around the kitchen like a squirrel looking for a lost acorn. Trust me, once you start melting wax, you don’t want to leave it unattended!
Speaking of melting wax, let’s talk about how to do that safely. Beeswax has a higher melting point than other types of wax, which means it can take a little while to melt. The best way to melt beeswax is using a double boiler. Now, I know what you’re thinking: “What in the world is a double boiler?” Don’t worry, it’s not as complicated as it sounds. A double boiler is just a fancy term for placing a heatproof bowl over a pot of simmering water. The steam from the water gently melts the wax without scorching it. You can also use a dedicated wax melter if you have one, but a double boiler works just fine for beginners.
Once your beeswax is melted, it’s time to add some color! This step is totally optional, but if you want to get creative, here’s your chance. You can use special candle dyes, or even old crayon bits. Just toss them in with the melted wax and stir until the color is evenly distributed. Remember, a little goes a long way! You don’t want your candle looking like it just walked out of a neon party (unless that’s the look you’re going for, of course).
If you want your candle to smell like more than just honey, you can add some essential oils to the mix. A few drops of lavender or peppermint can transform your candle into a mini aromatherapy session. Imagine lighting your new candle after a long day, closing your eyes, and feeling the stress melt away with each whiff of calming lavender. Ahhh, doesn’t that sound nice? Just make sure to stir the oils in well so they blend with the wax. And don’t overdo it—essential oils are strong! A few drops will do the trick.
With our wax melted, colored, and scented to perfection, it’s time for the exciting part: the pour! But before you get too excited and pour hot wax all over your kitchen, remember to secure your wick in your container. This is where the wick holder or pencil comes in. Place the wick in the center of your container, and use the holder or pencil to prop it up so it stays in place. You want the wick to stand tall and proud in the center, like a brave little soldier ready to light the way.
Now, carefully pour the melted wax into your container, leaving a little bit of space at the top. Take your time with this step—there’s no rush. Candle-making is all about enjoying the process and taking a moment to relax. As you pour, imagine the beautiful, glowing candle you’re about to create, and let yourself feel a little bit proud of all your hard work.
Once your wax is poured, it’s time to let it cool and harden. This part can take a few hours, so be patient! If you’re like me and have the patience of a squirrel with a cup of coffee, this might be the hardest part of the whole process. But trust me, it’s worth the wait. Letting the candle cool slowly helps prevent cracks and ensures an even, smooth finish. Resist the urge to poke or move your candle while it’s cooling—just let it be.
After the candle has cooled completely, you might notice a small dip or “sinkhole” around the wick. Don’t panic! This is totally normal and easy to fix. Simply reheat a small amount of your leftover wax and pour it into the dip to fill it in. Allow it to cool again, and voilà! Your candle is as good as new.
Once your candle is completely cooled and set, trim the wick to about ¼ inch. This is the perfect length to ensure a nice, clean burn. And there you have it! Your very own homemade beeswax candle, made with love and a little bit of elbow grease.
Now, it’s time to light your creation and bask in the warm, golden glow of your hard work. Maybe even treat yourself to a cup of tea and a good book while you’re at it. Or give your candle as a gift to a friend or loved one—they make wonderful presents, especially when they’re handmade.
Making beeswax candles is more than just a craft; it’s a way to bring a little more light and love into your home. It’s about taking a moment to slow down, connect with nature, and create something beautiful with your own two hands. And who knows? You might just find that making candles is your new favorite hobby. Happy candle-making!
Ingredients:
1 pound of beeswax (pellets or a block)
Candle wicks (100% cotton or hemp)
Wick holders or pencils (to keep the wick centered)
Candle containers (heat-resistant jars, tins, or teacups)
Essential oils (optional, for scent; e.g., lavender, peppermint)
Candle dye or crayon bits (optional, for color)
Double boiler (or a heatproof bowl and pot for melting wax)
Newspaper or old tablecloth (to protect your work surface)
Scissors (for trimming the wick)
Step-by-Step Instructions:
Prepare Your Workspace: Cover your work surface with newspaper or an old tablecloth to protect it from spills. Gather all your ingredients and tools, and place them within easy reach.
Set Up Your Double Boiler: Fill a pot with about an inch or two of water and place a heatproof bowl on top to create a double boiler. Heat the water on low to medium heat to gently melt the wax. If you have a dedicated wax melter, you can use that instead.
Melt the Beeswax: Add your beeswax to the heatproof bowl or wax melter. Allow it to melt slowly, stirring occasionally with a heat-resistant spoon. Beeswax has a high melting point, so this might take some time. Be patient and keep an eye on the wax to prevent overheating.
Add Color (Optional): If you want to add color to your candle, now is the time! Stir in a small amount of candle dye or crayon bits into the melted beeswax. Stir until the color is evenly mixed.
Add Essential Oils (Optional): For a scented candle, add a few drops of your favorite essential oils to the melted wax. Stir well to distribute the scent evenly. Remember, a little goes a long way, so don’t overdo it with the oils.
Prepare the Wick: Place the wick in the center of your chosen candle container. Use a wick holder or a pencil to hold the wick upright and centered. You can wrap the wick around the pencil or clip it to a wick holder to keep it steady.
Pour the Wax: Carefully pour the melted beeswax into the container, leaving about half an inch of space at the top. Pour slowly to avoid spilling and ensure an even fill. Make sure the wick stays centered as you pour.
Let the Candle Cool: Allow the candle to cool and harden at room temperature. This can take several hours, so be patient. Avoid moving the container or touching the wax while it’s setting to prevent any dents or cracks.
Fix Any Sinkholes: After the candle has cooled completely, you might notice a small dip or sinkhole around the wick. To fix this, reheat a small amount of leftover wax and pour it into the dip to fill it in. Let it cool again until fully set.
Trim the Wick: Once the candle is completely cooled and set, trim the wick to about ¼ inch above the wax. This is the ideal length for a clean, even burn.
Enjoy Your Candle: Light your new beeswax candle and enjoy the warm glow and lovely scent! Relax, take a deep breath, and pat yourself on the back for a job well done.
And there you have it—a beautifully crafted, homemade beeswax candle! Whether you keep it for yourself or gift it to someone special, your handmade candle is sure to brighten up any room and warm any heart. Happy crafting!
Support@rusticrootshomestead.com
© 2024 Rustic Roots Homestead - All rights reserved.