
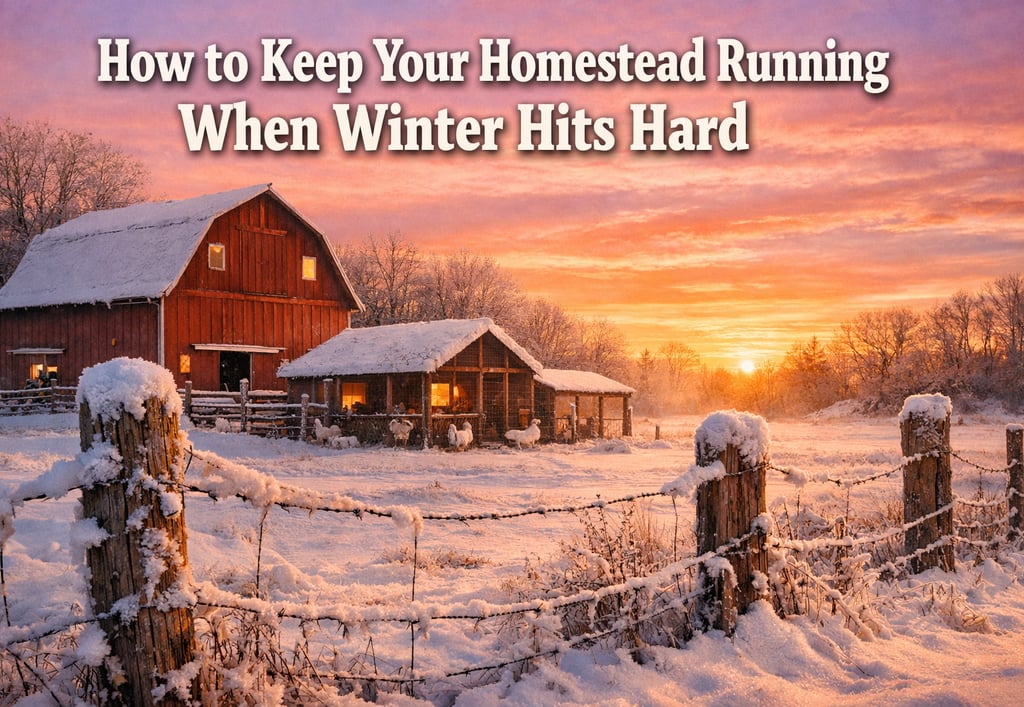
How to Keep Your Homestead Running When Winter Hits Hard
A practical, honest guide to keeping your homestead running during brutal winter weather, from water management and coop winterization to knowing when to stay inside and let the difficult days pass.
HOMESTEADINGBACKYARD LIVESTOCKPREPPING
1/24/20266 min read
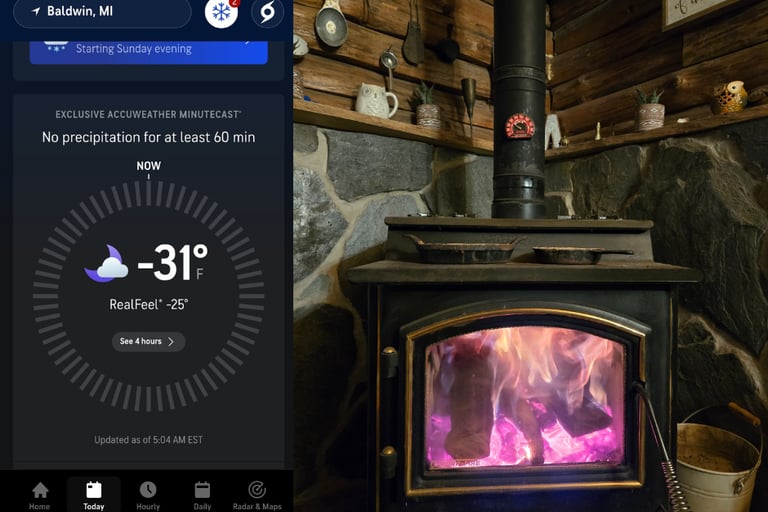
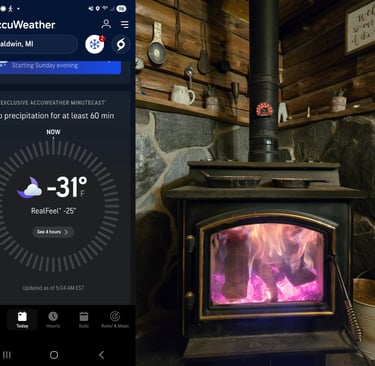
Last February, I stood in my barn at 6 AM watching my breath form clouds in the frigid air, staring at a frozen water line that had burst overnight. The temperature had dropped to -8°F, and I was about to learn some expensive lessons about winter homesteading the hard way.
If you're reading this while bundling up for another trip outside to check on your animals, or you're worried about the forecast calling for bitter cold, I get it. Winter homesteading isn't for the faint of heart, but it doesn't have to be a constant battle against the elements either.
After seven years of homesteading in Michigan—where winter isn't just a season, it's a personality trait—I've figured out what actually works when the mercury drops and what's just nice-sounding advice that falls apart when you're dealing with real cold.
(Thankful for the woodstove that day!!!)
The Morning Routine That Changed Everything
Here's what nobody tells you about winter homesteading: your summer routine will absolutely destroy you in winter if you don't adapt it.
I used to do all my chicken coop work in the evening. Made perfect sense in summer—cooler temperatures, no rush, pleasant way to wind down the day. Then winter hit, and I found myself stumbling around in the dark at 5 PM, trying to break ice in frozen waterers with numb fingers while my headlamp battery died.
The shift I made: Everything critical happens in the morning now, right after sunrise. The chickens get fresh water while it's still (relatively) warm. I can actually see what I'm doing. And if something goes wrong—which it will—I have the entire day to fix it instead of scrambling in the dark.
Pro tip: Keep a dedicated "winter morning kit" by your door—insulated gloves, headlamp with fresh batteries, ice pick, and a thermos of hot water. You'll use all of it more than you think.
Water: The Never-Ending Winter Battle
Let's be honest—keeping water liquid in sub-zero temperatures feels like a part-time job. I've tried just about everything: heated waterers, rubber tubs you can stomp to break the ice, carrying hot water multiple times a day.
What actually works for us:
Heated waterer for chickens - We used to use heated dog bowls, but I found they get real messy, real quick so I switched to a heated chicken waterer and it made all the difference.
When Your Chickens Stop Laying (And Why That's Okay)
Every December, someone in my local homesteading group posts frantically about their hens stopping egg production. The comments fill up with suggestions: add lights, increase protein, check for illness, buy expensive supplements.
Michelle and I went through this panic our first winter. We tried everything. You know what we learned? Sometimes chickens just need a break.
The comparison: Think about your garden. You wouldn't expect tomatoes in January (unless you're running a heated greenhouse). Chickens naturally slow down or stop laying when daylight decreases—it's not a crisis, it's biology.
That said, if you want to encourage winter laying without stressing your flock, there are some gentle approaches that actually work. The key is supporting your chickens' health through winter, not forcing production.
Pro tip: The money we used to spend on supplements and special feeds in winter? We redirected it to buying local eggs when our hens take their break. Supporting a neighbor, less stress on our flock, and honestly their eggs are fantastic.
The Coop Weatherproofing I Wish I'd Done Earlier
Our first winter, I was obsessed with keeping the coop warm. I sealed every crack, restricted ventilation, even considered a space heater (don't do this—fire hazard).
The result? Moisture buildup, respiratory issues, and miserable chickens despite my best intentions.
Here's what I learned about winterizing your chicken coop:
Chickens handle cold remarkably well—it's the moisture and drafts that cause problems. You want good ventilation at the roof level to let moisture escape, but no drafts at chicken level where they're roosting.
The difference between a draft and ventilation:
Draft = Direct cold air blowing on your birds where they sleep
Ventilation = Air exchange happening above them, removing moisture-laden air
We added ventilation near the roof peak and sealed gaps at ground level. The coop actually feels warmer now with better airflow than it did when I had it sealed up tight. Counter-intuitive, but it works.
The Deep Litter Method: Controversial But Game-Changing
I avoided deep litter bedding for years because it sounded complicated and slightly gross. Then one particularly brutal January, I was too busy to keep up with weekly coop cleaning.
Accidentally discovered the deep litter method works.
Instead of removing bedding weekly: You keep adding fresh bedding on top, letting the bottom layers compost. The composting process actually generates heat—not enough to warm the coop dramatically, but every bit helps. Plus, you're cleaning the coop once or twice all winter instead of weekly.
The reality check: This isn't for everyone. If you have a small coop or persistent moisture issues, it might not work well. But for us, with a 8x10 coop for eight hens, it's been transformative. The coop smells fine, stays drier, and I get beautiful compost in spring.
Pro tip: Start this method in fall, not mid-winter. You want those composting layers established before the cold really hits.
Feed Storage Gets Complicated in Winter
Room temperature feed in summer? Easy. Winter feed storage? That's when you discover mice are incredibly motivated engineers.
We lost an entire 50-pound bag of feed our first winter to mice who somehow chewed through "rodent-proof" plastic. That's $30 and a lot of frustration.
Our current system:
Metal trash cans for all feed storage (actually rodent-proof)
Store in an unheated but sheltered area—not the heated house where condensation becomes an issue, not outside where it freezes
Buy smaller quantities more frequently when possible (fresh feed, less storage time for pests to find it)
The metal cans were a $60 investment that paid for themselves the first time they kept mice out of a $40 bag of layer feed.
The Emergency Supplies That Actually Matter
Everyone talks about having emergency supplies. Let me tell you what actually gets used versus what sits in a corner looking good:
Gets used constantly:
Backup waterers (not if, but when something breaks or freezes)
Extra bedding stored where you can access it in a snowstorm
Spare heat lamp bulbs and a working backup lamp
Simple tools: ice pick, rubber mallet, shovel you can actually find
Sounds good but rarely needed:
Elaborate first aid kits (basic supplies yes, but the fancy stuff mostly expires unused)
Expensive backup generators (nice if you have them, but most winter emergencies you can muscle through)
The most valuable emergency preparation? A well-stocked pantry so you're not driving to town in a snowstorm because you ran out of coffee. Homestead emergencies are exhausting—having comfort food and hot drinks on hand matters more than you'd think.
When to Call It and Stay Inside
Here's something experienced homesteaders know but rarely say out loud: sometimes the best choice is to do the bare minimum and stay inside.
Last January, we had three days where wind chills hit -30°F. I didn't putter around doing projects. I didn't reorganize the barn. I gave the chickens food and water, made sure everyone was okay, and went back in the house.
The bare minimum that keeps everyone alive and healthy:
Fresh water (even if you're hauling it every few hours)
Adequate food
Dry, draft-free shelter
Quick visual health check
Everything else? It can wait for better weather.
I spent years feeling guilty about this, like I wasn't a "real" homesteader if I wasn't outside grinding through brutal conditions. That's nonsense. Sustainable homesteading means knowing when to push and when to conserve your energy for the long haul.
The Mental Game of Winter Homesteading
Nobody talks about this enough: winter homesteading is mentally exhausting in ways summer never is.
You're bundling up multiple times daily. Everything takes twice as long. Simple tasks become complicated. The sun sets at 5 PM and you feel like you've accomplished nothing despite working all day.
What helps:
Tracking small wins instead of focusing on everything left undone
Having indoor homestead projects ready for truly brutal weather days (seed starting, planning, maintenance you can do inside)
Accepting that your homestead looks rough in winter and that's normal—this isn't Instagram, it's February
Michelle and I have a rule: we don't make major homestead decisions in January or February. Our winter-brain thinks everything is terrible and we should sell the place and move to Florida!! Our spring-brain remembers why we love this life.
Both perspectives are valid—you just can't let the winter one make permanent decisions.
Spring Is Coming (Really)
That morning with the burst pipe? I fixed it, learned from it, and winterized better the next year. We still have hard mornings when the temperature plummets and everything feels difficult.
But I'll tell you what: when those first spring days hit and you walk outside without needing three layers, when you hear your hens singing again and notice the daylight lasting longer, when you realize you made it through another winter with everyone healthy—there's something deeply satisfying about that.
Winter homesteading isn't about eliminating all the challenges. It's about building systems that work, learning from what doesn't, and accepting that some days you're just going to be hauling water in the cold because that's what needs doing.
Keep your coffee hot, your gloves dry, and remember—every day that passes is one day closer to spring.
Support@rusticrootshomestead.com
© 2024 Rustic Roots Homestead - All rights reserved.