
Winter Sowing Seeds: The Budget Method That Actually Works (Yes, Even in the Snow)
Learn the budget seed-starting method that lets you grow 100+ plants for under $30 while the snow is still falling. Winter sowing uses recycled containers and Mother Nature to create tougher seedlings than expensive indoor setups ever could.
GARDENING
1/25/202615 min read
A realistic guide to starting your garden in January using milk jugs and determination—no greenhouse, grow lights, or indoor space required.
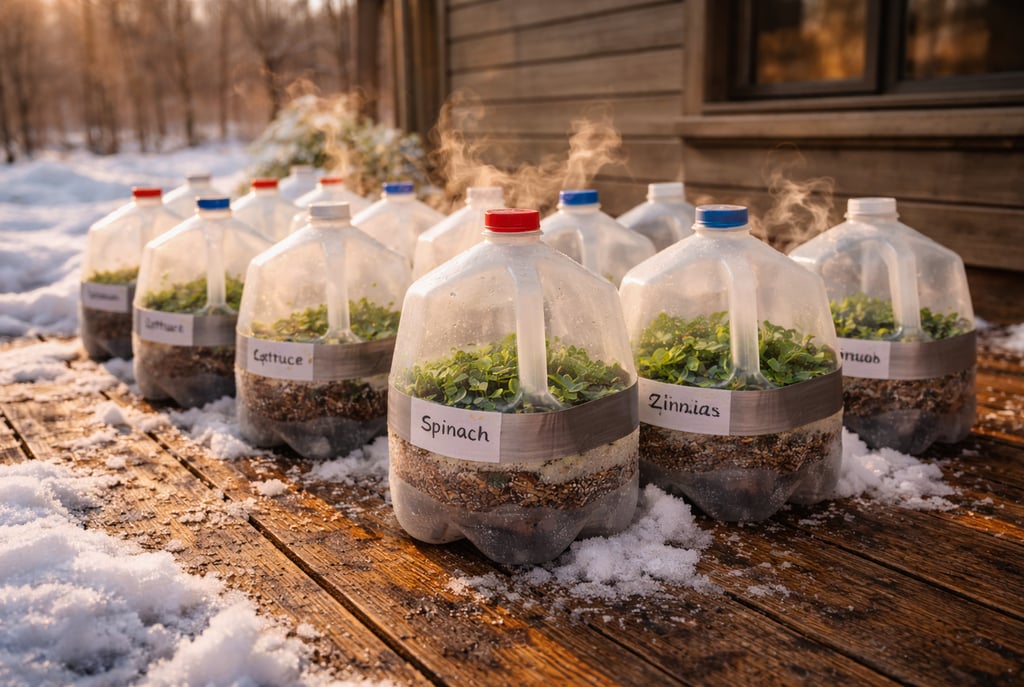
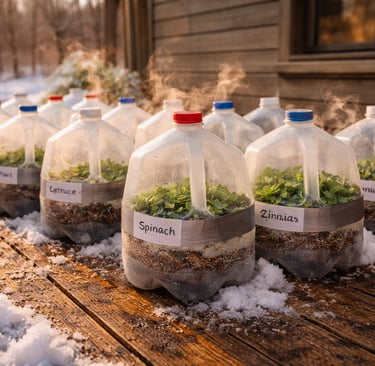
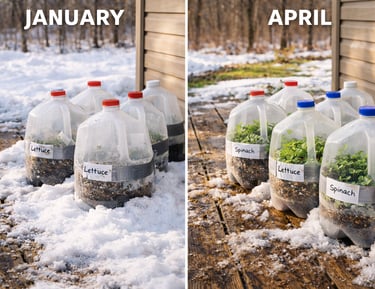
Last January, I was scrolling through Instagram at 10 PM—as one does when winter feels endless—and saw a photo that stopped me cold. Someone had rows of milk jugs sitting in the snow, and inside those jugs were actual green plants. Growing. In January. In Michigan.
I thought it was either fake or some kind of advanced homesteading wizardry I'd never master.
Turns out? Winter sowing is so simple I actually felt a little dumb for not trying it sooner. And if you're sitting inside right now, staring at seed catalogs while snow falls outside, wondering if you have to wait until April to do anything garden-related—I've got good news for you.
(Spoiler: You can literally start your garden this weekend. Yes, really.)
What Is Winter Sowing (And Why Haven't You Heard About It Before?)
Here's the concept that sounds too good to be true but somehow works: you plant seeds in containers, put those containers outside in the middle of winter, and let nature do what nature does best.
No grow lights. No heat mats. No taking over your spare bedroom with seedling trays. No hardening off (that annoying process where you gradually acclimate indoor seedlings to outdoor conditions). The plants just... grow when they're ready.
The comparison: Remember how winter homesteading teaches you to work with the season instead of fighting it? Winter sowing is the gardening version of that philosophy. You're not trying to trick plants into thinking it's spring—you're letting them experience the natural cold period they actually need, then sprout when conditions are right.
Why This Works (The Science Part, Made Simple)
A lot of seeds—especially perennials and cold-hardy plants—actually need a period of cold, moist conditions to germinate properly. In nature, seeds fall to the ground in autumn, experience winter, and then sprout in spring.
When you try to start these seeds indoors under grow lights at 70°F, they're confused. They're waiting for that cold period that never comes.
Winter sowing gives them exactly what they're programmed to expect: cold temperatures, natural temperature fluctuations, real weather. Then when spring actually arrives, they germinate with zero confusion.
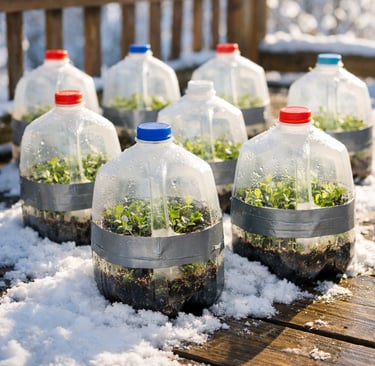
The milk jug acts as a mini greenhouse—protecting the seeds from being eaten or washed away, while still letting them experience winter's reality check.
Pro tip: This is why winter-sown seedlings are typically stockier and tougher than indoor-started plants. They've been training in the harsh outdoor gym since day one.
🎁 FREE GUIDE: 5 Biggest Beginner Homesteading Mistakes (And How to Avoid Them)
Before you start winter sowing (or any homesteading project), learn from others' mistakes instead of making your own. Get our free guide with the costly errors most beginners make—and exactly how to avoid them.
Instant download. Practical advice from real homesteaders.
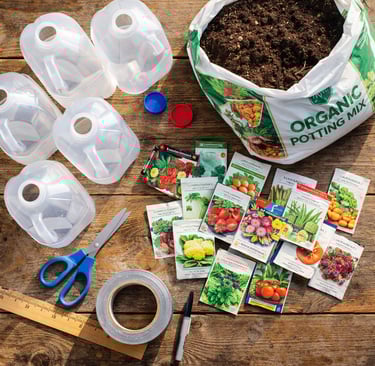
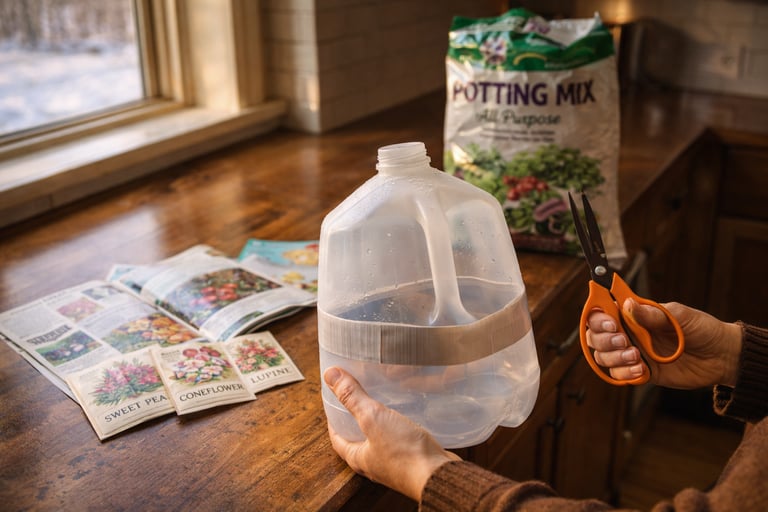
The Supplies You Actually Need (And What You Can Skip)
I'm going to save you money right now. You don't need fancy seed-starting supplies for this method.
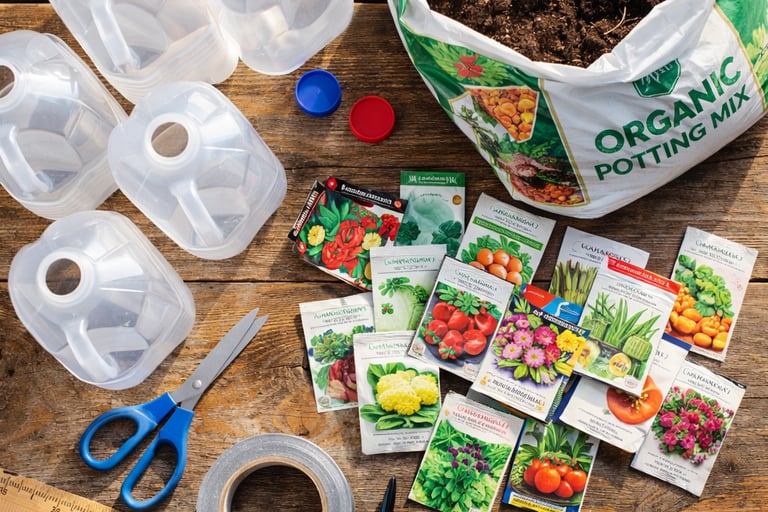
You absolutely need:
Clear plastic containers (milk jugs are perfect, but 2-liter soda bottles or clear takeout containers work too)
Potting soil (not garden soil—it's too heavy)
Seeds (we'll talk about which ones in a minute)
Duct tape or packing tape
Scissors or box cutter
Permanent marker
Water
You can completely skip:
Grow lights ($50-200 saved)
Heat mats ($20-40 saved)
Seed starting trays ($15-30 saved)
Any heated indoor space
Total investment if you're buying everything? Maybe $15. Total investment if you're using containers you already have? The cost of seeds and soil.
Compare that to a full indoor seed-starting setup and we're talking about saving $100+ easily.
How to Set Up Your Winter Sowing Containers (The Actually Simple Version)
Alright, let's do this. Grab a milk jug and let's turn it into a seed-starting powerhouse.
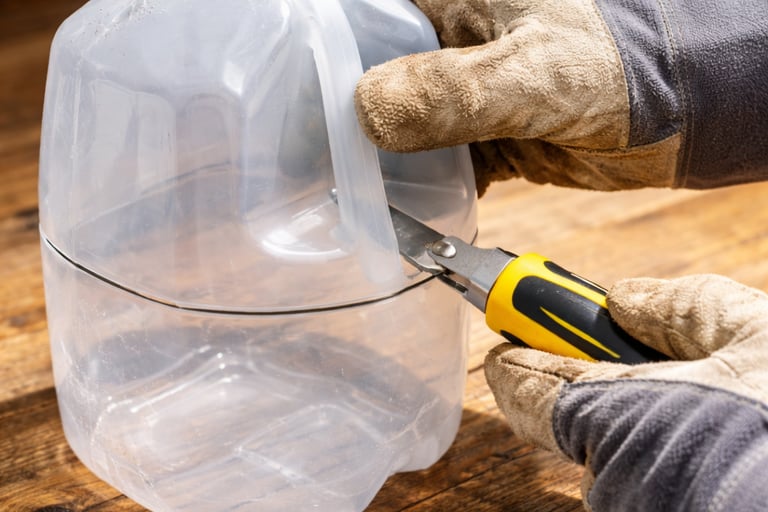
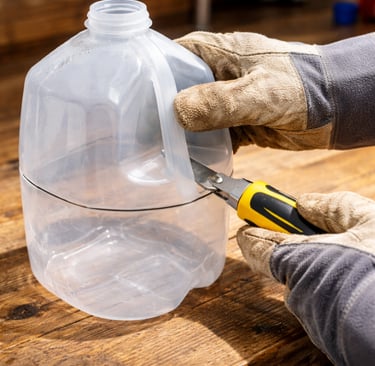
Step 1: Cut Your Container
Take your scissors or box cutter and cut horizontally around the jug about 3-4 inches from the bottom. Here's the important part: don't cut all the way around. Leave about 2 inches uncut near the handle area—this creates a "hinge" so the top and bottom stay connected.
Why the hinge? Because you're going to be opening and closing this thing, and trust me, trying to keep track of loose tops is annoying. The hinge is a game-changer.
Pro tip: If you're using a box cutter, start the cut with scissors to punch through the plastic, then use the box cutter for the smooth cuts. Safer and easier.
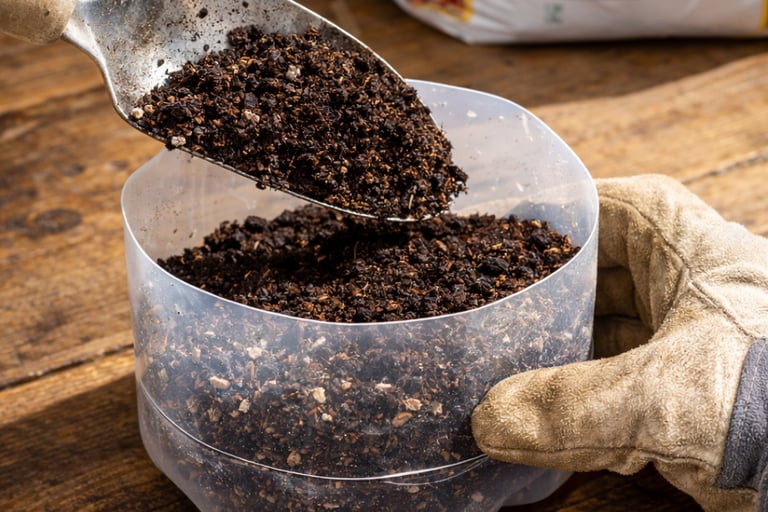
Step 2: Add Drainage Holes
Flip that bottom section over and poke 4-6 drainage holes in the bottom using scissors, a knife, or even a heated nail (if you're feeling fancy). Water needs to drain out or your seeds will rot.
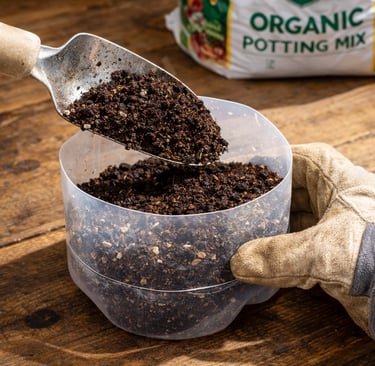
Step 3: Fill With Soil
Add about 3-4 inches of moistened potting soil to the bottom half. Not soaking wet, not bone dry—think "wrung-out sponge" moisture level. You should be able to squeeze the soil and have it hold together without water dripping out.
Step 4: Plant Your Seeds
This is where you follow the seed packet directions. Some seeds need to be planted 1/4 inch deep, some just pressed onto the surface. Different seeds, different rules.
The beauty of winter sowing? You can be a bit more generous with seeds than you would indoors. Plant more than you think you need. Some won't germinate, and that's fine—you'll thin them out later.
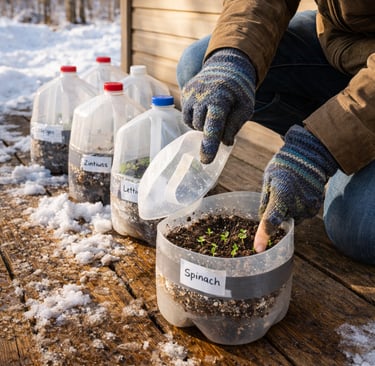
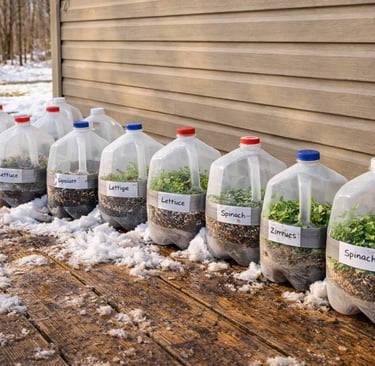
Label the outside of each jug with what you planted and the date. Use a permanent marker directly on the jug. Trust me on this—you will absolutely forget which jug is which by February.
Step 5: Close It Up
Close the top half over the bottom half and tape it shut with duct tape. This is not the time for subtle tape application—go around the whole seam. You want it sealed but not permanently fused.
Step 6: Remove the Cap
Unscrew the jug's cap and leave it off. This provides ventilation and lets rain/snow get in to water your seeds. Natural irrigation, folks.
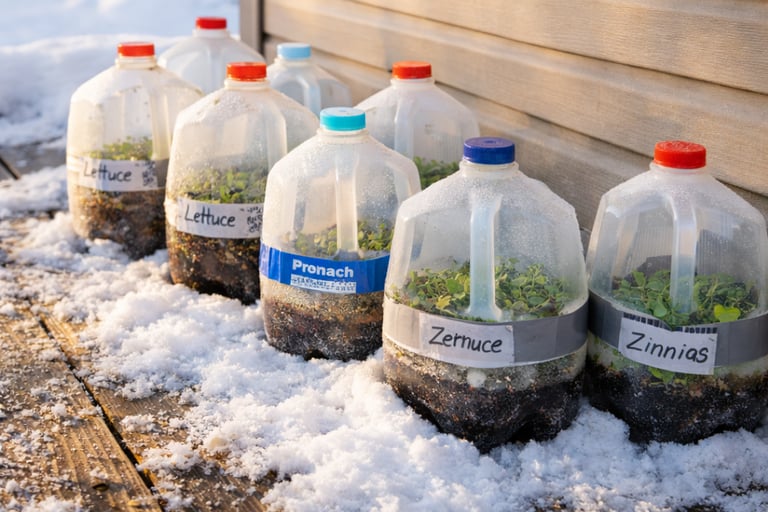
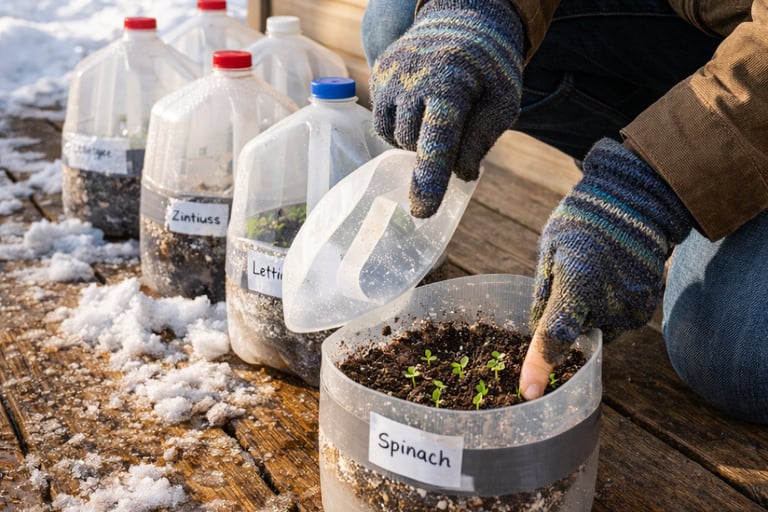
Step 7: Put Them Outside
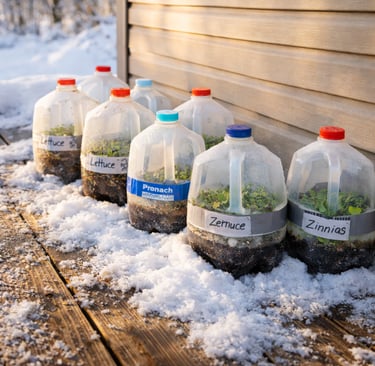
This is the part that feels wrong but is absolutely right: take those jugs and put them outside. On your deck, in your yard, wherever. They can sit in snow. They can freeze. They can get rained on. That's literally the point.
Find a spot that gets decent sun but isn't going to blow away in wind. I set mine against the side of the house where they're visible but protected from the worst wind.
What Seeds Actually Work for Winter Sowing
Not every seed is a good candidate for winter sowing. Some need that cold period. Some don't care. Some will just rot in cold, wet conditions.
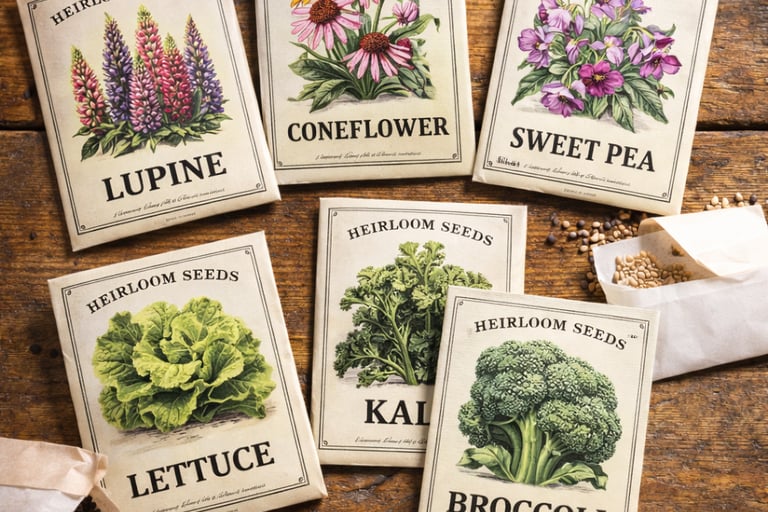
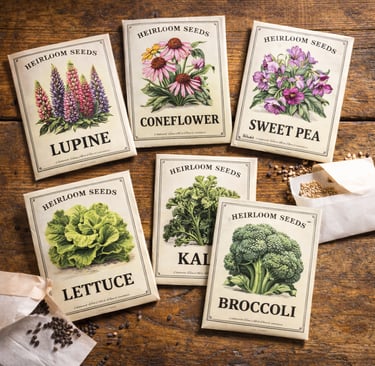
Seeds that love winter sowing:
Perennial flowers: Coneflowers, Black-eyed Susans, Columbine, Lupine, Milkweed
Hardy annuals: Sweet Peas, Snapdragons, Calendula, Bachelor's Buttons
Cool-season vegetables: Lettuce, Spinach, Kale, Broccoli, Cabbage
Herbs: Oregano, Thyme, Sage
Seeds to sow later (late February/March):
Tomatoes
Peppers
Zinnias
Cosmos
Marigolds
These tender plants don't need cold stratification and can actually germinate in the jugs once temperatures warm up a bit. You're still getting that outdoor toughness, just with a slightly later start.
Seeds that don't work well:
Root vegetables (carrots, radishes—just direct sow these in spring)
Squash and cucumbers (they have long taproots that hate transplanting)
Beans (direct sow—they grow so fast there's no point)
Pro tip: Check the seed packet. If it says "requires stratification" or "cold treatment" or "sow outdoors in fall," that's your sign it's a great winter sowing candidate.
The Timeline (When Things Actually Happen)
This is important because otherwise you'll be checking your jugs every day in January wondering why nothing's happening yet.
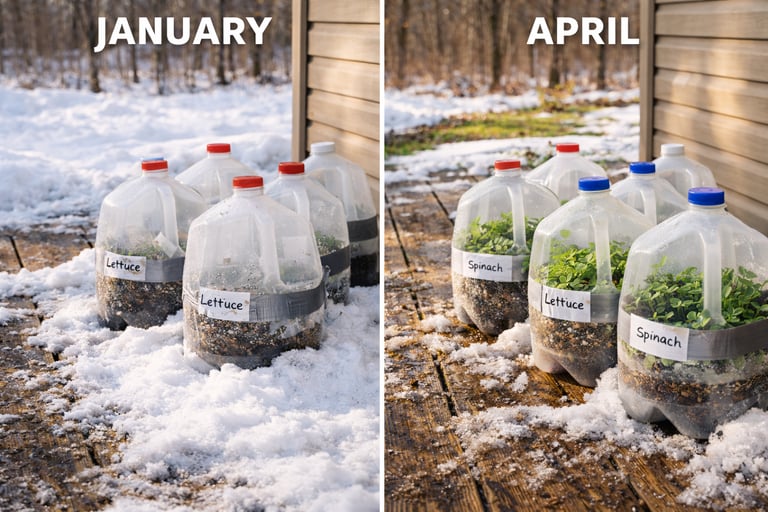
January-February: You plant. Seeds sit there doing what seeds do in winter—waiting. The jugs might fill with snow. That's fine. They might freeze solid. Also fine.
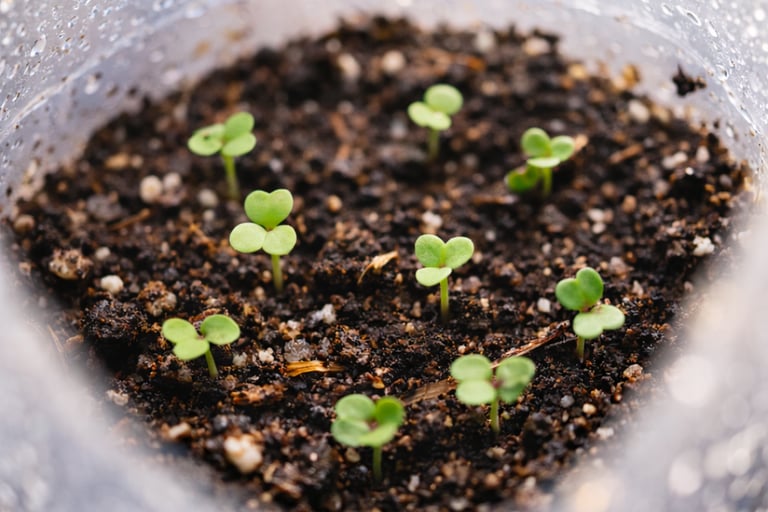
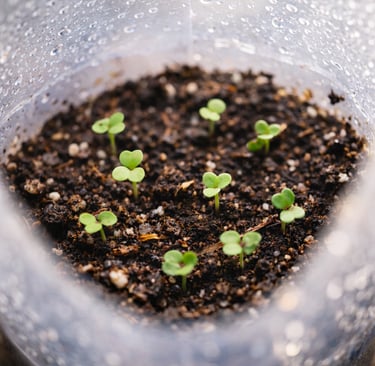
Late February-March: Depending on your zone and the weather, you might start seeing action. Tiny green specks appearing in the soil. This is the exciting part.
March-April: Things get real. Seedlings grow. You might need to start venting the jugs on warm days (lift the top half open a bit) so they don't get too hot inside. On cold nights, tape them back shut.
Late April-May: Your seedlings are getting big. When they have 2-4 true leaves and outdoor nighttime temperatures are consistently above what that plant can handle, it's transplant time.
Michelle and I keep our jugs outside until we're ready to transplant. No hardening off needed—they've been living outside their whole lives.
The Maintenance (Or Lack Thereof)
Here's what I love about winter sowing: there's basically nothing to do.
What you need to check:
Once a month: Peek in and make sure the soil hasn't completely dried out. In most climates, rain and snow provide plenty of moisture. In dry climates or during warm spells, you might need to add water.
When temps hit 50°F+: Start venting. Open the top half during the day to let heat escape. You're preventing the seedlings from cooking in a too-hot greenhouse.
Watch for early sprouters: Some seeds germinate faster than others. If you see growth, pay more attention to that jug.
What you don't need to do:
Bring them in during cold snaps (they're fine)
Cover them during snow (they're designed for this)
Check on them daily (you'll drive yourself crazy)
Worry excessively (seriously, they're tougher than you think)
I check mine weekly at most. Sometimes I forget about them for two weeks. They survive just fine.
Pro tip: The hardest part of winter sowing is trusting the process. You're not abandoning your seeds—you're giving them exactly what they need.
When Things Go Wrong (Because They Sometimes Do)
Not every winter sowing attempt is going to be perfect. Let me save you some worry by telling you what's normal and what's actually a problem.
Normal:
Some jugs don't germinate (seed failure happens)
Uneven germination (some sprout in March, some in April)
Leggy seedlings (thin them out—they're competing for light)
Mold on soil surface (usually harmless, just increased humidity)
Actually problems:
Standing water that won't drain (your drainage holes got clogged)
Totally dry soil (in dry climates, you might need to water)
Jugs blowing all over the yard (you need to weight them down or move them)
The fix: More drainage holes if water's the issue. Add water if it's too dry. Weight down jugs with bricks or rocks if wind is a problem.
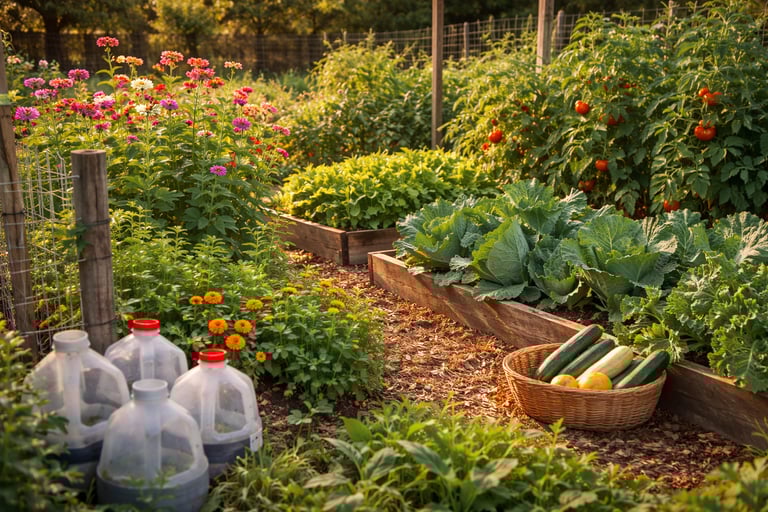
The Transplanting Part (Where You Actually Get Plants)
This is the payoff. When your seedlings have grown enough that they're getting crowded in the jug and outdoor temperatures are right for that plant, it's time to move them to the garden.
How you'll know they're ready:
They have at least 2-4 sets of true leaves (not just the first baby leaves)
They're getting crowded in the container
Outdoor temperatures are consistently safe for that plant type
Your garden soil is workable (not frozen or waterlogged)
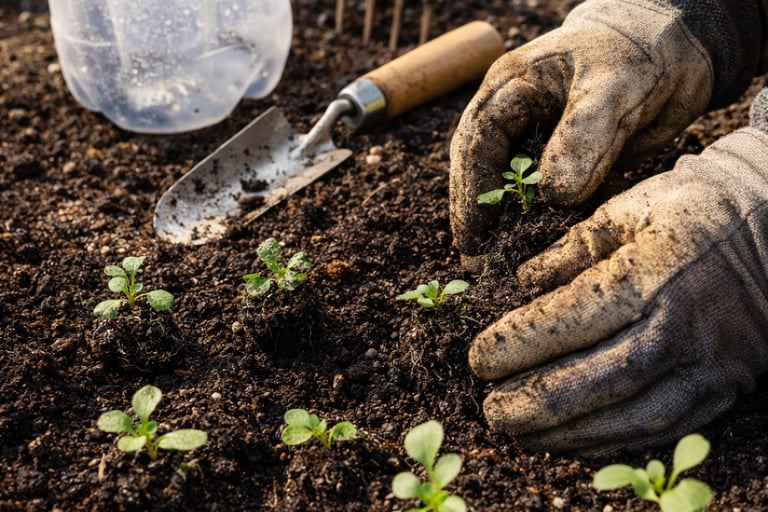
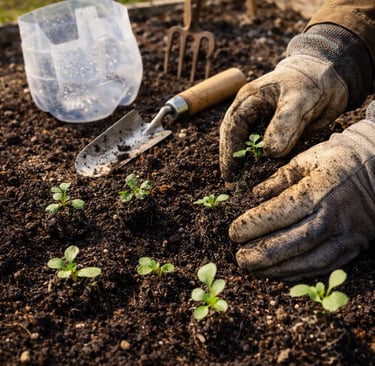
The actual transplanting:
Cut away the jug completely. You can't save it at this point—just cut it off and recycle the plastic. The whole thing is basically a disposable nursery pot.
Gently separate the seedlings, trying to keep roots intact. Some root disturbance is fine—they're tough.
Plant them in your prepared garden beds at the spacing recommended on the seed packet. Water them in. Done.
Because they've been living outside their whole lives, there's no adjustment period. They just keep growing.
Why I Wish I'd Started This Years Ago
I spent years thinking I needed a fancy seed-starting setup. I'd look at Instagram photos of people with shelves of seedlings under grow lights in their basements and think, "Someday when I have space and money, I'll do that."
Meanwhile, I was buying expensive starts from the nursery every spring. Six-packs of plants at $4-6 each add up fast when you're trying to fill garden beds.
Winter sowing costs me:
Containers: free (would be recycled anyway)
Soil: maybe $10 for a big bag that does multiple jugs
Seeds: $2-4 per packet
For about $30, I can start 100+ plants. Compare that to buying those same plants as starts and we're talking hundreds of dollars saved.
The other benefits I didn't expect:
Stronger plants. My winter-sown tomatoes outperform my indoor-started ones every single year. They're stockier, tougher, and seem to handle stress better.
No indoor mess. I don't have soil on the dining room table or grow lights taking over the spare room. It's all outside where garden mess belongs.
Better germination rates on tricky seeds. Milkweed, lupines, native wildflowers—seeds that need cold stratification just do better with winter sowing. I'm not trying to fake it in the refrigerator.
It's actually fun. There's something deeply satisfying about planting seeds in January while snow falls. You're doing something productive for your garden during a season that usually feels static.
Pro tip: Take photos of your jugs in January sitting in the snow, then again in March with seedlings, then in May in your garden blooming. The transformation is genuinely amazing and it's great social media content if that's your thing.
What About Zones and Timing?
The beauty of winter sowing is that it naturally adjusts to your climate. Seeds germinate when temperatures are right for them.
Very cold climates (Zones 3-5): Start in January-February with hardy perennials. Late February-March for tender annuals. Your growing season is short, so getting any head start helps.
Moderate climates (Zones 6-7): Start hardy stuff in January. Tender plants late February-March. This is where winter sowing really shines—your winters are cold enough to stratify seeds but not so brutal that the jugs get destroyed.
Milder climates (Zones 8-9): You can winter sow, but timing matters more. Start in December-January before your "winter" ends. Some seeds might not get cold enough—you might need to refrigerate them first before planting in jugs.
Really warm climates (Zones 10-11): Winter sowing is tricky. You don't have the cold period many seeds need. You're better off direct sowing in your actual mild winter or using other seed-starting methods.
Don't overthink the timing. The worst that happens is seeds don't germinate and you're out a few dollars. The best that happens is you have more plants than you know what to do with.
Pro tip: Start with just 3-4 jugs your first year. Learn the process. Scale up once you see it actually works.
Resources That Actually Helped Me
Look, I'm not going to pretend I figured this all out on my own. When I was learning winter sowing, I found these resources genuinely helpful:
WinterSown.org - The original winter sowing website with extensive guides
Local seed swaps - Great way to get interesting varieties cheap
Your seed packets - Seriously, read them. They tell you what each seed needs
And honestly? Trial and error. Some years are better than others. Some seeds do great, some don't. That's gardening.
If you're dealing with brutal winter conditions like we do in Michigan, having a garden project you can work on even in January helps with that cabin fever. It's something productive when everything else feels frozen.
The Questions I Had (And You Probably Do Too)
"What if animals get into the jugs?" The sealed jugs with tape around them are pretty secure. I haven't had issues with animals. Worst case, they knock one over. Pick it up, re-tape it, move on.
"Do I need to water them?" In most climates, no. Rain and snow provide moisture. In very dry climates or during warm dry spells, check monthly and water if the soil is bone dry.
"What if it's too cold?" The seeds are dormant. They're designed to handle cold. Your zone's normal winter temperatures are fine. If temps drop to -30°F for weeks, you might have issues, but most seeds handle typical winter just fine.
"Can I start vegetables this way?" Some, yes. Cool-season crops like lettuce, kale, cabbage family—great for winter sowing. Warm-season crops like tomatoes and peppers—wait until late February/March when there's enough warmth to germinate them.
"What about damping off disease?" Good air circulation (venting on warm days) and not overwatering prevents this. It's less common in winter sowing than indoor seed starting because of the natural temperature fluctuations.
"Do I need special seeds?" Nope. Any seeds appropriate for winter sowing work. You're not buying special winter-sowing varieties. Just regular seeds that match your climate and the winter sowing method.
My First-Year Winter Sowing Mistakes (So You Don't Make Them)
Mistake #1: Started too many varieties I got excited and planted 20 different jugs. Couldn't keep track of what was what even with labels. Start small.
Mistake #2: Didn't vent on warm days March hit 60°F for a week and I didn't open the jugs. Seedlings got leggy and weak from the heat. Vent when it's warm.
Mistake #3: Planted seeds too deep Tiny seeds need light to germinate. I buried everything 1/4 inch deep. Some never came up. Follow the seed packet directions.
Mistake #4: Used garden soil instead of potting mix Garden soil is too heavy. It compacted and stayed soggy. Seeds rotted. Always use potting soil.
Mistake #5: Gave up too early I thought nothing was happening by mid-March and almost tossed the jugs. Two weeks later, everything sprouted. Be patient.
Is Winter Sowing Right for You?
Honestly? If you're reading this, you're probably the right person for winter sowing.
It's perfect if:
You don't have indoor space for seed starting
You're on a budget (aren't we all?)
You want tougher, stockier plants
You like low-maintenance gardening methods
You need something productive to do in winter
Maybe skip it if:
You live in Zone 10-11 without winter
You already have a seed-starting setup you love and it's working
You need very specific timing (though you can control that with later sowing)
You don't have any outdoor space
Michelle and I will absolutely be winter sowing again this year. We're already saving milk jugs. Already looking through seed catalogs. Already planning which varieties to try.
Because here's the thing: winter sowing takes the pressure off. You're not managing perfect temperatures and lighting schedules. You're not constantly checking moisture levels. You're working with nature's timing instead of trying to control everything.
And when those first seedlings pop up in March? When you realize you just started your entire garden for less than $30? When you transplant those tough little plants into your beds and watch them thrive?
That's homesteading magic right there.
Let's Be Honest About Expectations
Winter sowing isn't going to give you perfect germination rates like a climate-controlled indoor setup. Some jugs won't germinate. Some will germinate weakly. Some will be stellar successes.
That's fine.
Even with a 50% success rate (which is conservative—you'll probably do better), you're still getting plants for pennies instead of dollars. You're still getting tougher seedlings. You're still gardening in January.
The point isn't perfection. The point is that it works, it's cheap, and it's way more fun than staring out the window wishing spring would hurry up.
Keep Track of Everything (Because You Will Forget)
Here's what happens every year: I start seeds in January, plant more in February, direct sow some in April, and by June I cannot remember what I planted where or when anything is supposed to be ready.
Winter sowing is amazing, but it's just one piece of the garden planning puzzle. You've also got:
Succession planting schedules
When to start different seeds indoors vs. outdoors
Crop rotation planning (so you're not planting tomatoes in the same spot every year)
Harvest timing so you're not drowning in zucchini all at once
Michelle finally convinced me we needed an actual system. That's why we created The Complete Homestead Planner—it has month-by-month garden planning worksheets, planting calendars, harvest tracking, and all the stuff that keeps you organized instead of chaotic.
For just $27, you get 82 pages of fillable worksheets and planning tools that cover everything from garden planning to livestock schedules to food preservation. It's literally everything we wish we'd had when we started.
Pro tip: The garden planning section includes a winter sowing tracker so you actually remember which jug has which seeds. Because by March, those marker labels you were so sure about? Not so readable anymore.
Okay, back to actually getting your winter sowing started...
Getting Started This Weekend
Here's your action plan if you want to try this:
Tonight: Save any milk jugs or clear containers. Wash them out.
This weekend: Gather supplies (containers, soil, seeds, tape, scissors). Spend an hour setting up 3-5 jugs. Put them outside.
January-March: Check them occasionally. Vent on warm days. Otherwise, leave them alone.
April-May: Transplant when ready. Enjoy your garden that cost basically nothing to start.
That's it. That's the whole process.
You don't need special skills. You don't need expensive equipment. You just need some recycled containers, basic supplies, and the willingness to trust that plants know what they're doing.
Winter sowing won't solve all your gardening challenges. But it will give you something to do right now while winter drags on. It'll save you money. It'll give you stronger plants. And it'll make you feel like you're getting ahead of the game while everyone else is still flipping through seed catalogs dreaming about spring.
Spring is coming. But you don't have to wait to start your garden.
Get those milk jugs ready. Your seedlings are waiting.
Related Reading:
Building Your Emergency Food Storage - Because gardens are great, but having a stocked pantry matters too
How to Keep Your Homestead Running When Winter Hits Hard - More winter survival strategies for homesteaders
Got questions about winter sowing? Drop a comment below. Already winter sowing? Tell us what's worked (or hasn't worked) for you!


Support@rusticrootshomestead.com
© 2024 Rustic Roots Homestead - All rights reserved.